Creating Game Development Tools with Google Chrome
One of the short cuts I made in creating the video poker game was loading all the card and button images separately. Loading fifty plus images is fine for a weeklong hackathon but not so much when it adds seconds to the load time. One promising project I found was PackULike, a desktop and Java WebStart app for packaging sprites.
Even when using a Java game library in Java like PlayN , it's easier to create and maintain tools that use HTML5, JS, and CSS than Java Swing. And I'm saying this as a creator of desktop Java app framework. PackULike came closest to what I wanted so I decided to port it to HTML5 and add the features I wanted (adding a descriptor file to describe the images in the sprite sheet).
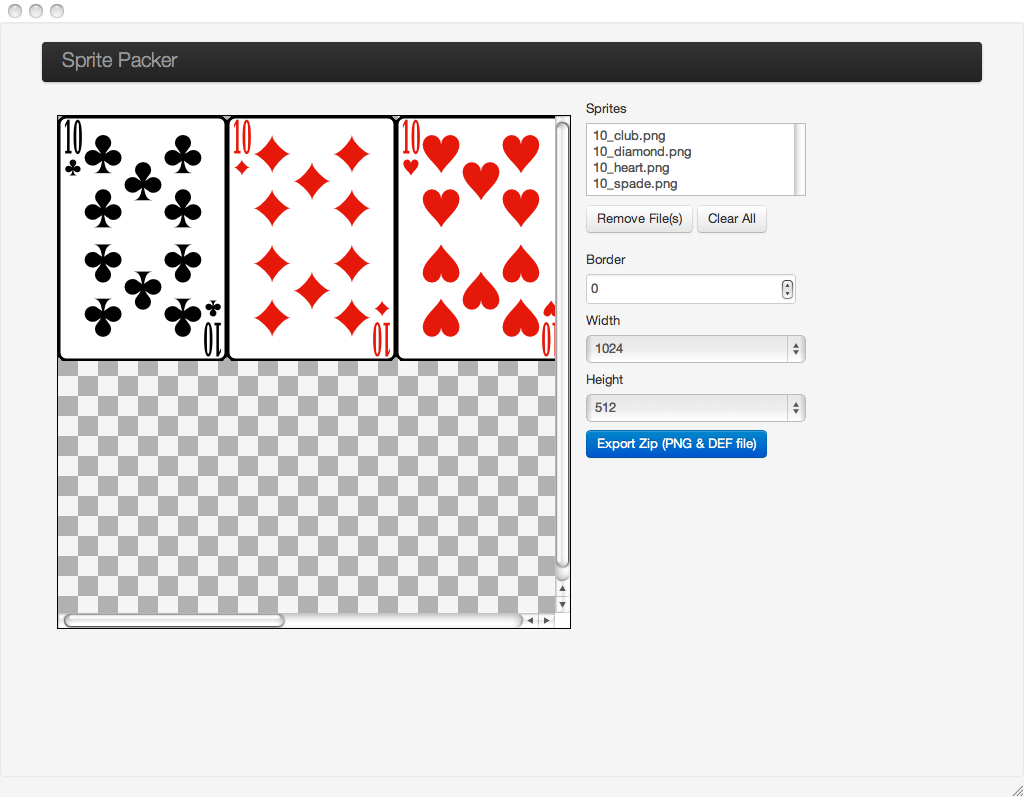
I wanted to be able to create a sprite sheet, add images with drag and drop, set sprite sheet and border size, remove files, and create an archive of the sprite sheet and the definition file describing it.
Porting to JavaScript and beyond
Porting from Java to JavaScript reduced a lot of complexity. Instead of wrangling Java2D Graphics and BufferedImage objects, I could use Canvas and Image.
After finishing the core functionality of the app, I decided to play with some of the new Chrome App APIs I learned about at Google I/O. It was a breeze. Below are the manifest.json and background.js files I added to the project. Besides the FileWriter stuff(shown below), all other code stayed the same.
manifest.json
{
  "name": "Sprite Sheet Maker",
  "manifest_version":2,
  "version":"0.1.1",
  "app": {
    "background": {
      "scripts": ["js/background.js"]
    }
  },
  "permissions": ["experimental","app.window", "fileSystem", "fileSystemWrite", "notifications"]
}
background.js
chrome.app.runtime.onLaunched.addListener(function() {
  chrome.appWindow.create('index.html', {
    'width': 1024,
    'height': 800
  }, function(id) {
    window.application = new Application();
  });
});
Chrome's FileSystem APIs allow you to use native File Selector dialogs for both opening, creating AND saving files. This is one area that made the code a little more complicated. Instead of creating my zip file and using window.location to download it, I had to convert the file data to be be used by Blob and the Writer API. It's one line versus fifteen. The more verbose version lets you select the file name and location as opposed to a filename and location picked by the browser. In my opinion, that's a fair trade.
// Run this if just running the HTML file outside of an extension
//location.href = "data:application/zip;base64," + content;
//
// Packaged app
chrome.fileSystem.chooseFile({type: 'saveFile'}, function(writableFileEntry) {
  writableFileEntry.createWriter(function(writer) {
    writer.onerror = function(err) {console.log(err)};
    writer.onwriteend = function(e) {
      // Show notification
    };
    // write the bytes of the string to an ArrayBuffer
    var raw = atob(content);
    var ab = new ArrayBuffer(content.length);
    var uInt8Array = new Uint8Array(raw.length);
    for (var i = 0; i < raw.length; i++) {
        uInt8Array[i] = raw.charCodeAt(i);
    }
    writer.write(new Blob([uInt8Array], {type:'application/zip'}));
  },  function(err) {console.log(err)});
As the AppWindow stuff is still in Developer Preview, no apps in the Chrome Web Store use it yetso check out the source code here: https://github.com/jwill/nagademo-2012/tree/master/SpritePacker
Pro-tip: Try to use as much MVC standards in your code as possible, it will save you a lot of headaches later when you port to manifest version 2 and its higher restrictions on code.
![]()